If you’ve just set up your Shopify store, one of the most important steps to start selling online is learning how to upload products on Shopify. This process may seem a bit difficult at first, but Shopify makes it easy, even for beginners.
This guide walks you through the process of adding products, including product descriptions, image uploads, pricing, managing inventory, and optimising your listings for better sales.
By the end, you’ll be ready to upload products and welcome customers.
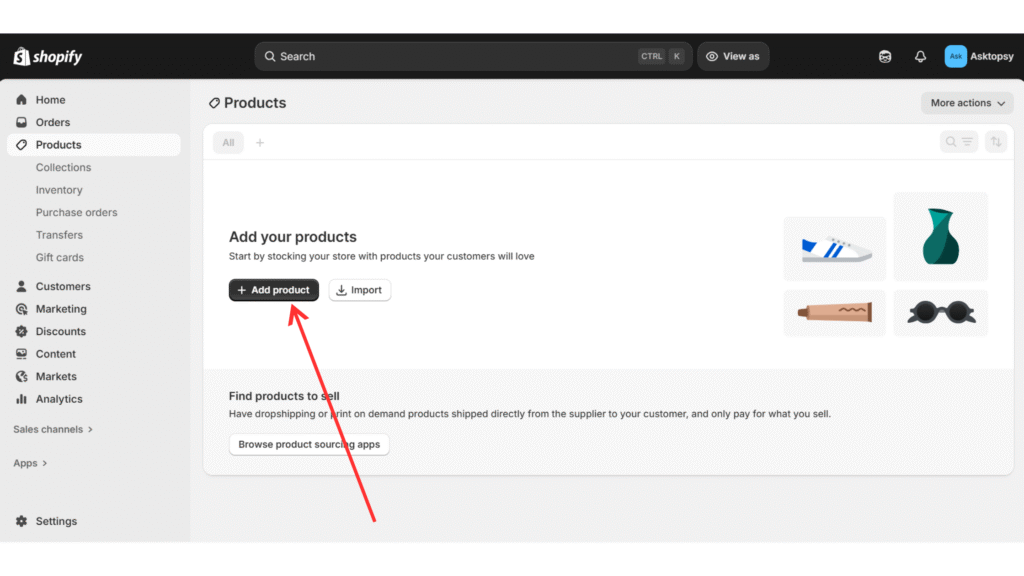
Step 1: Add a New Product
Visit Shopify.com and log in with your store details. After accessing your dashboard, navigate to the left sidebar, click on Products, and then choose Add Product. This will take you to the product upload page, where you can enter all the details for your product.
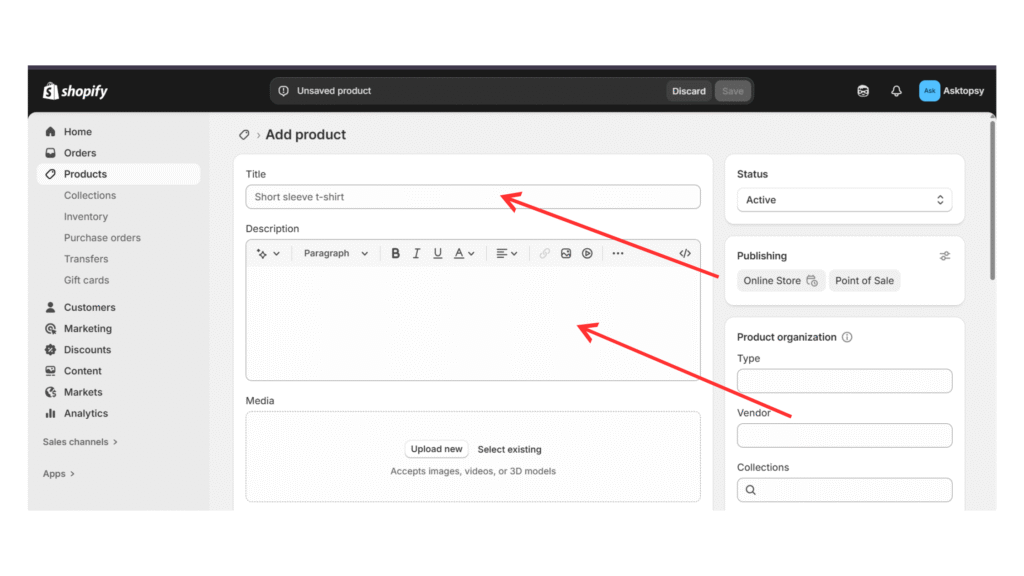
Step 2: Add Product Details
Adding the correct product details is one of the most important aspects of setting up your Shopify store, as this is where you convince a customer to click “buy.”
(1) Product Title: Make it brief and memorable. It will help you and consumers recall the product name easily.
(2) Product Description: When writing the description, keep it unique and highlight the key features and benefits. Share product details such as size, material, color, ingredients, and usage. Make the text easy to scan by using bullet points or bold text.
(3) SEO (Search Engine Optimization): Adding keywords such as the exact phrases customers would type into Google helps your store appear in search results, making it easier for potential customers to discover you.
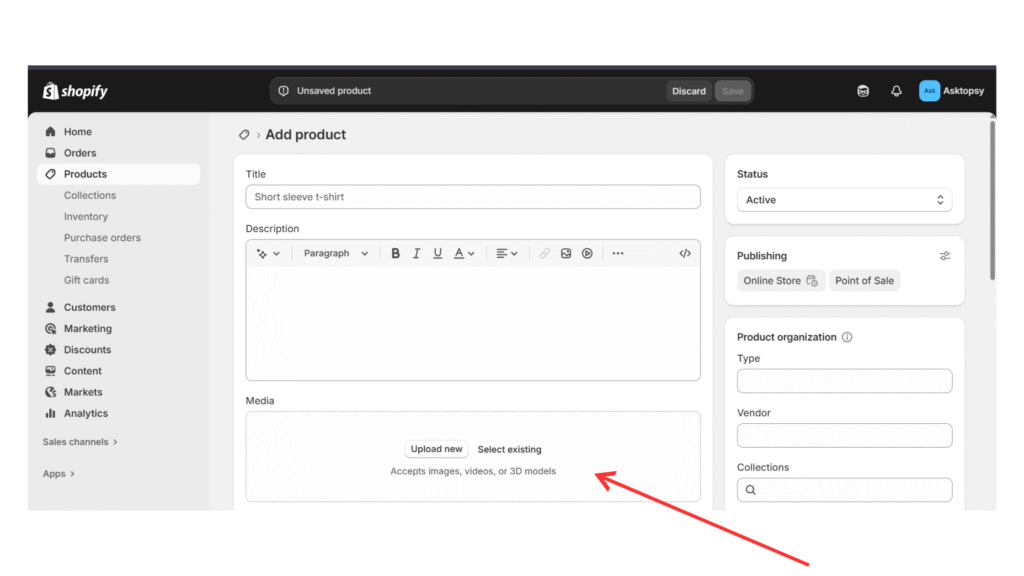
Step 3: Add Product Images and Media
On Shopify, you can upload multiple product photos from different angles, include close-up shots of details, and even add lifestyle images that show the product in use.
Before uploading, ensure that you name your image files properly (for example, “organic-shea-butter-200g.jpg” instead of “IMG123.jpg”), as this helps with SEO and makes your products easier to find on Google.
Keep images consistent in size and style, and include close-ups of important features. The goal is to help customers feel sure that what they see is what they’ll get. Use professional-looking photos to build trust and encourage users to click “add to cart.”
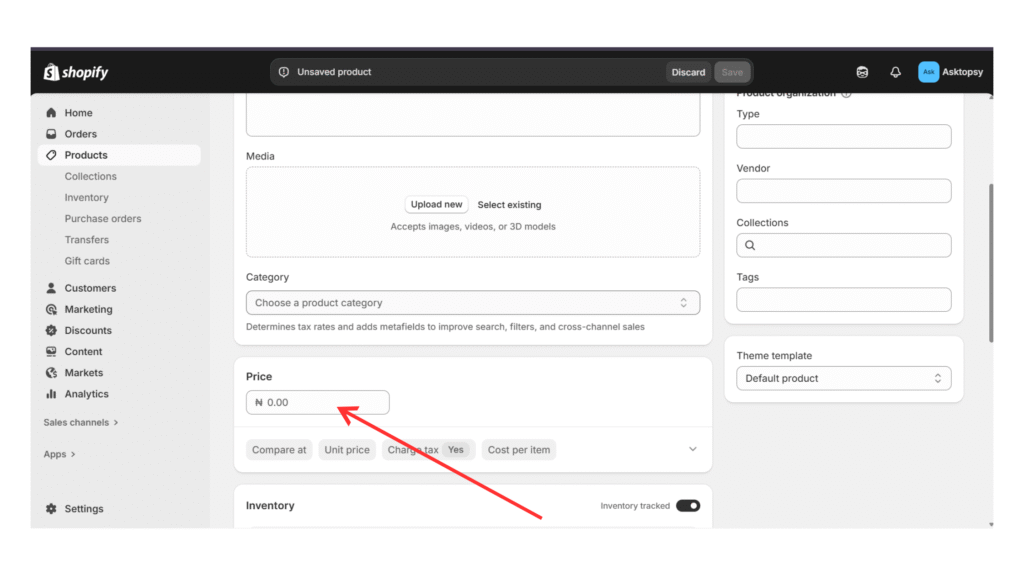
Step 4: Set the Product Price
Pricing your product on Shopify is one of the most important steps as it significantly impacts your sales, customer perception, and profit margins.
In the Shopify pricing section, you’ll need to set the amount customers will pay, decide whether to show a discount by adding a “compare at price,” and enter the cost per item so Shopify can automatically calculate your profit.
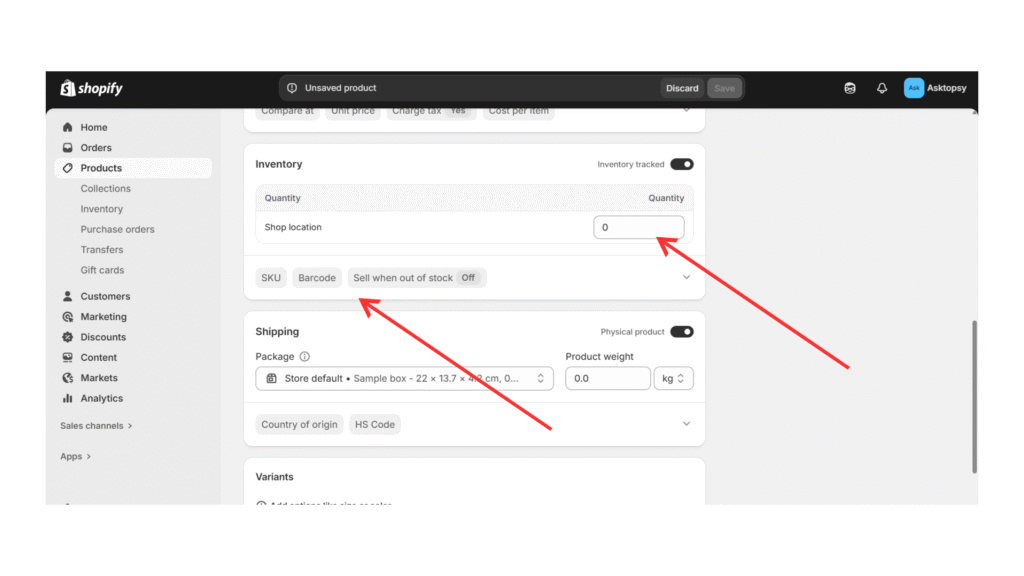
Step 5: Manage Inventory Settings
In the Inventory section of your Shopify dashboard, you’ll enter the details that help you manage and track your stock.
Start by adding your SKU (Stock Keeping Unit), a unique code you create to track each product. If you have a barcode, you can add it as well; this is especially helpful if you manage a large inventory or plan to sell in physical stores.
Next, decide if you want Shopify to track product quantity automatically. When this is enabled, Shopify will reduce your stock each time a sale is made, which helps you avoid overselling.
You can also choose to allow customers to continue purchasing when an item is out of stock, which is useful if you offer preorders or backorders.
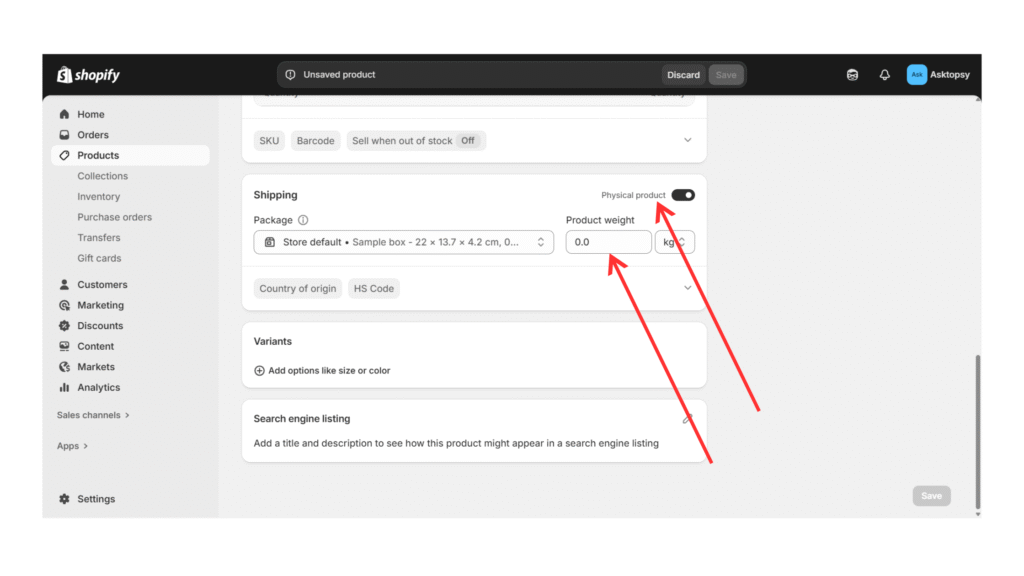
Step 6: Setup Shipping
If you’re selling a physical product on Shopify, ensure that you select the box labelled “This is a physical product.” This step is important because it tells Shopify that your item needs shipping.
Once you check the box, you’ll need to enter the product weight, which is essential for calculating accurate shipping rates at checkout.
Taking the time to set this up correctly ensures that your Shopify store provides accurate shipping costs, improves the shopping experience, and keeps your eCommerce business running smoothly.
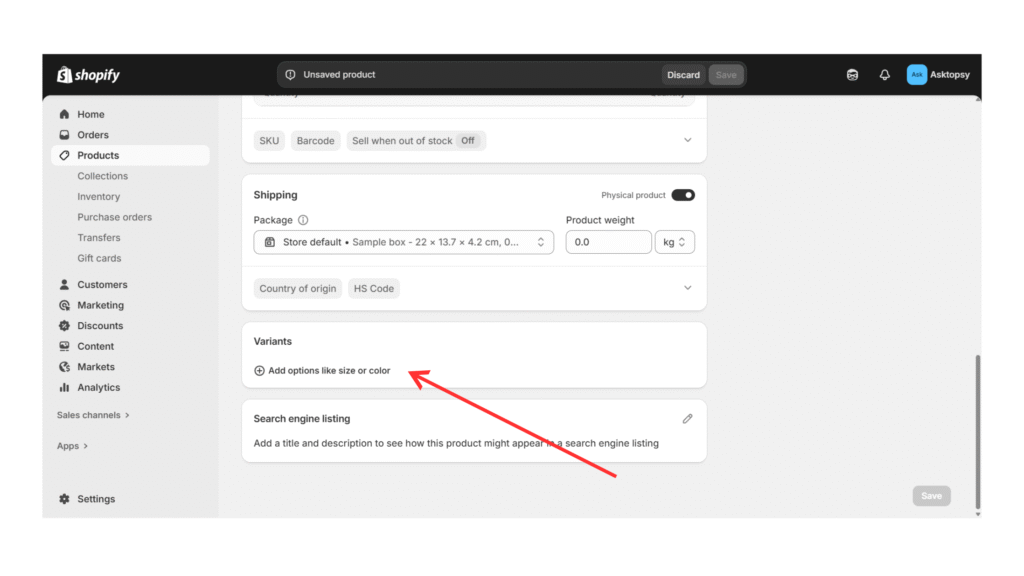
Step 7: Add Product Variants (Optional)
If your product comes in different options such as sizes, colours, or styles, Shopify allows you to add them under Product Variants.
Click on “Add options like size or colour”. For each selected option, you may provide Colour, Size, Material, and Size in the Option Name and Add values.
Each product variant in Shopify can have its own price, SKU, and inventory settings, which keeps your store organized and improves the shopping experience.
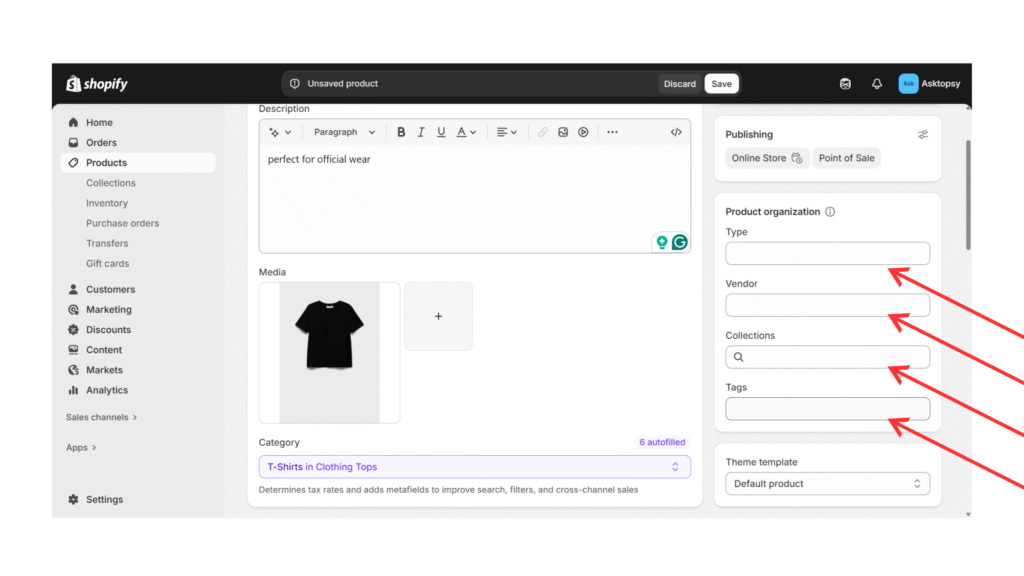
Step 8: Assign Product Tags and Categories
Once your images are ready, the next step is to place your products into the right categories or sections on your website. You will see Product Organization on the right side of the Shopify admin dashboard. You must fill out four fields in this section to determine the correct product category.
Product Type:This refers to the specific product category when adding product details. You can assign one or more categories, whichever applies to your product. It will help your customers find your products.
Vendor: Refers to the manufacturer or brand of the product you’re selling. Collections: This refers to a group of products organised together for easier browsing.
Product Tags: These are keywords relevant to the product listed, which act as searchable keywords that help customers find your products faster
By optimizing your Shopify collections and tags, you make your store more user-friendly, enhance the shopping experience, and improve your chances of ranking higher in search results. Organizing your products with the proper Shopify product tags and categories makes it easy for buyers to locate and search for products.
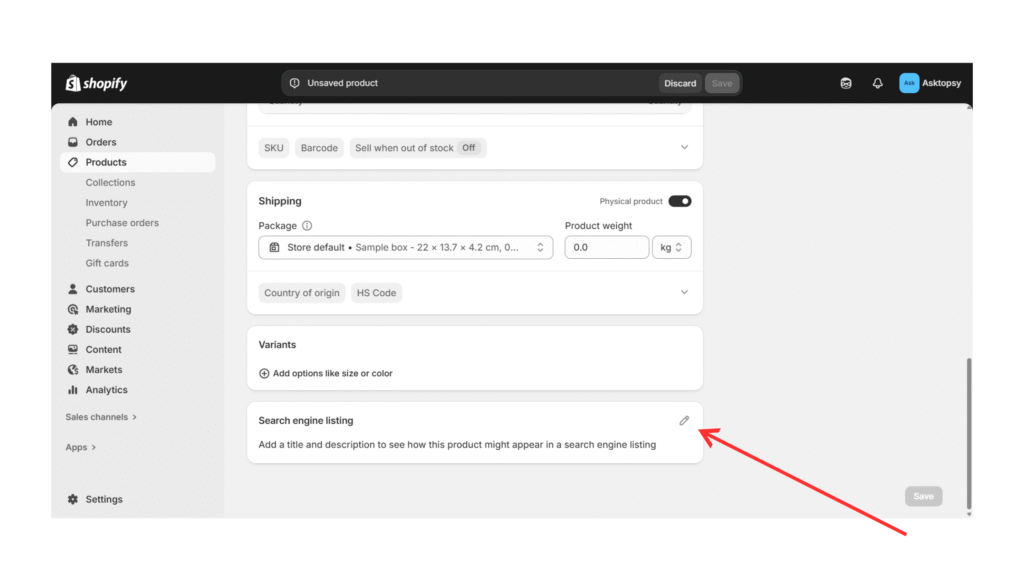
Step 9: Optimize Your Product for Search Engines (SEO)
On your Shopify product page, scroll down to the Search Engine Listing Preview section. It is where you make your product visible on Google and attract more customers.
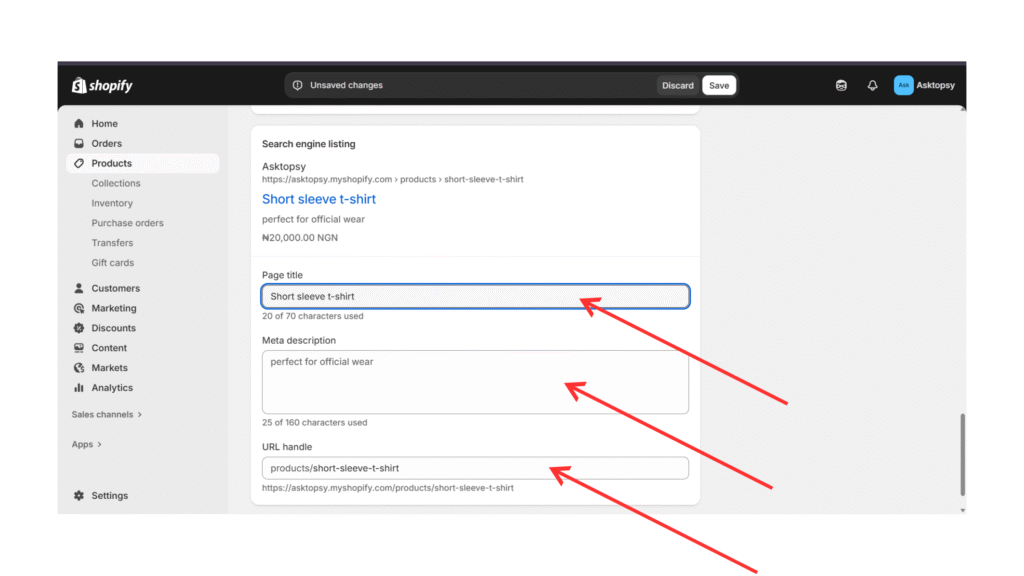
Here, you’ll need to:
(1) Write a Page Title (keep it under 60 characters and include your main keyword so Google knows what your product is about).
(2) Add a Meta Description (up to 155 characters, highlighting the benefits of your product and using keywords customers would search for).
(3) Customize the URL Handle (make it short, clean, and keyword-rich, e.g., “/organic-shea-butter-200g”).
Taking time to optimize your SEO on Shopify helps your products rank higher on Google, making it easier for shoppers to find, which drives more sales to your online store.
Leverage SEO tools, visit (https://ads.google.com/aw/keywordplanner/home) to optimize your performance for your product page within the platform and on Google.
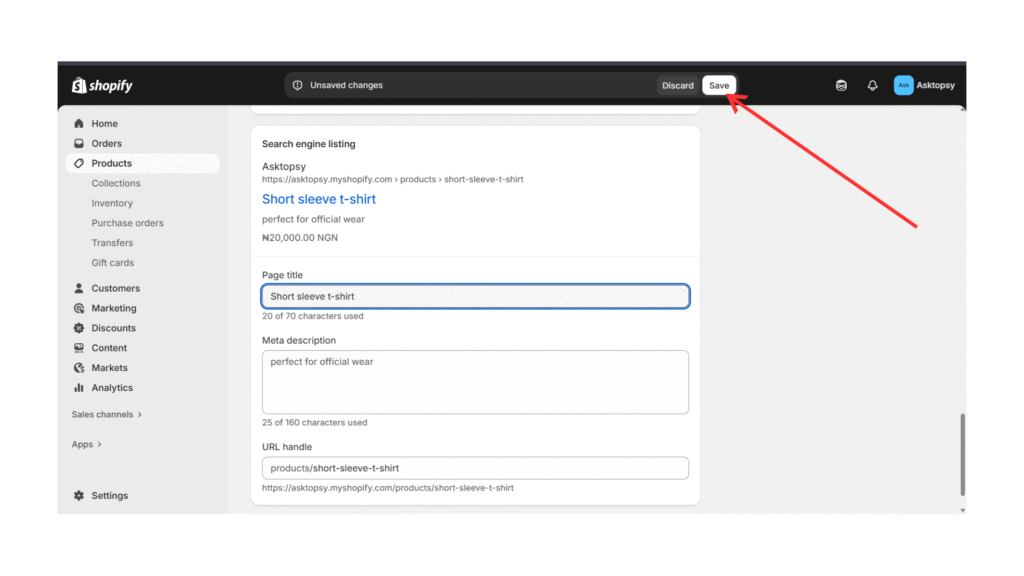
Step 10: Save and Publish Your Products
You have reached the final step!
Once you’ve added all your product details, scroll up and click Save. If you’re not ready for customers to see it yet, you can keep it as a Draft while you complete tasks such as pricing, SEO, or product images.
When you’re ready to start selling, change the status to Active and publish the product. This makes it live on your Shopify store, fully visible to customers and ready to appear in Google search results thanks to your SEO optimization.
Remember to quickly review all the information of new items added before clicking the “Save Product” button to enable Shopify product visibility.
Conclusion
Learning how to add products to Shopify is one of the most important steps to launching your online store.
Whether you’re selling skincare, fashion, hair, or even preorder items, Shopify makes it easy to scale your business if your product pages are done right.
So, log in to your Shopify admin today and upload your first product. The sooner you start, the sooner you’ll be ready to welcome your first customer!
Want to watch the video version?
You can check it out on our YouTube page by clicking the link below:
[https://youtu.be/nieJJiQiTVA]